Wood Chippings, the ‘no dig’ Gold

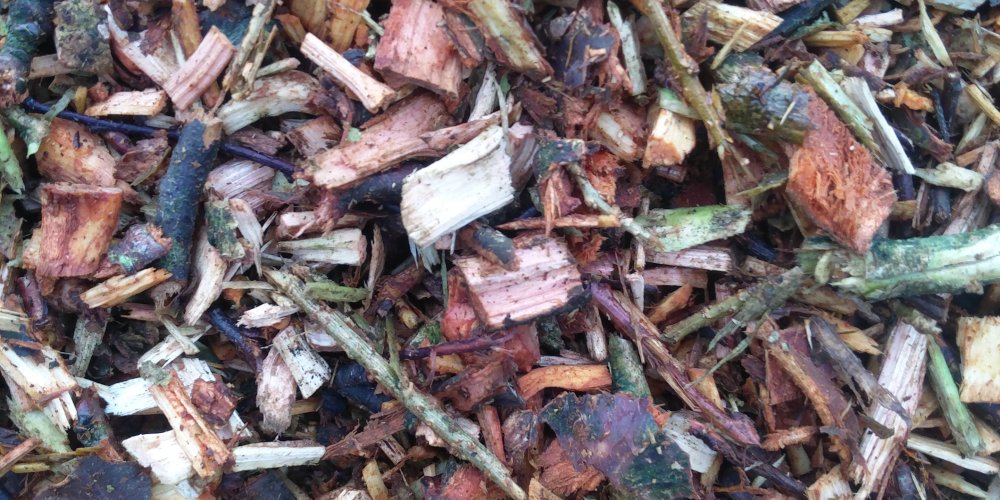
I’ve been bugging a few local tree surgeons for wood chippings for a while in order to continue on my ‘no dig’ journey. Today was my lucky day; two seperate people called me and said they had a truck load of chippings! 

I received cherry, sycamore, some Holly and a bit of ‘random shrub’. All of which I believe can be mulch material for most perennials. I asked if there was any conifer type material as I would have seperated this out to make ericacious compost for the acid loving plants like Holly and Blueberries. 

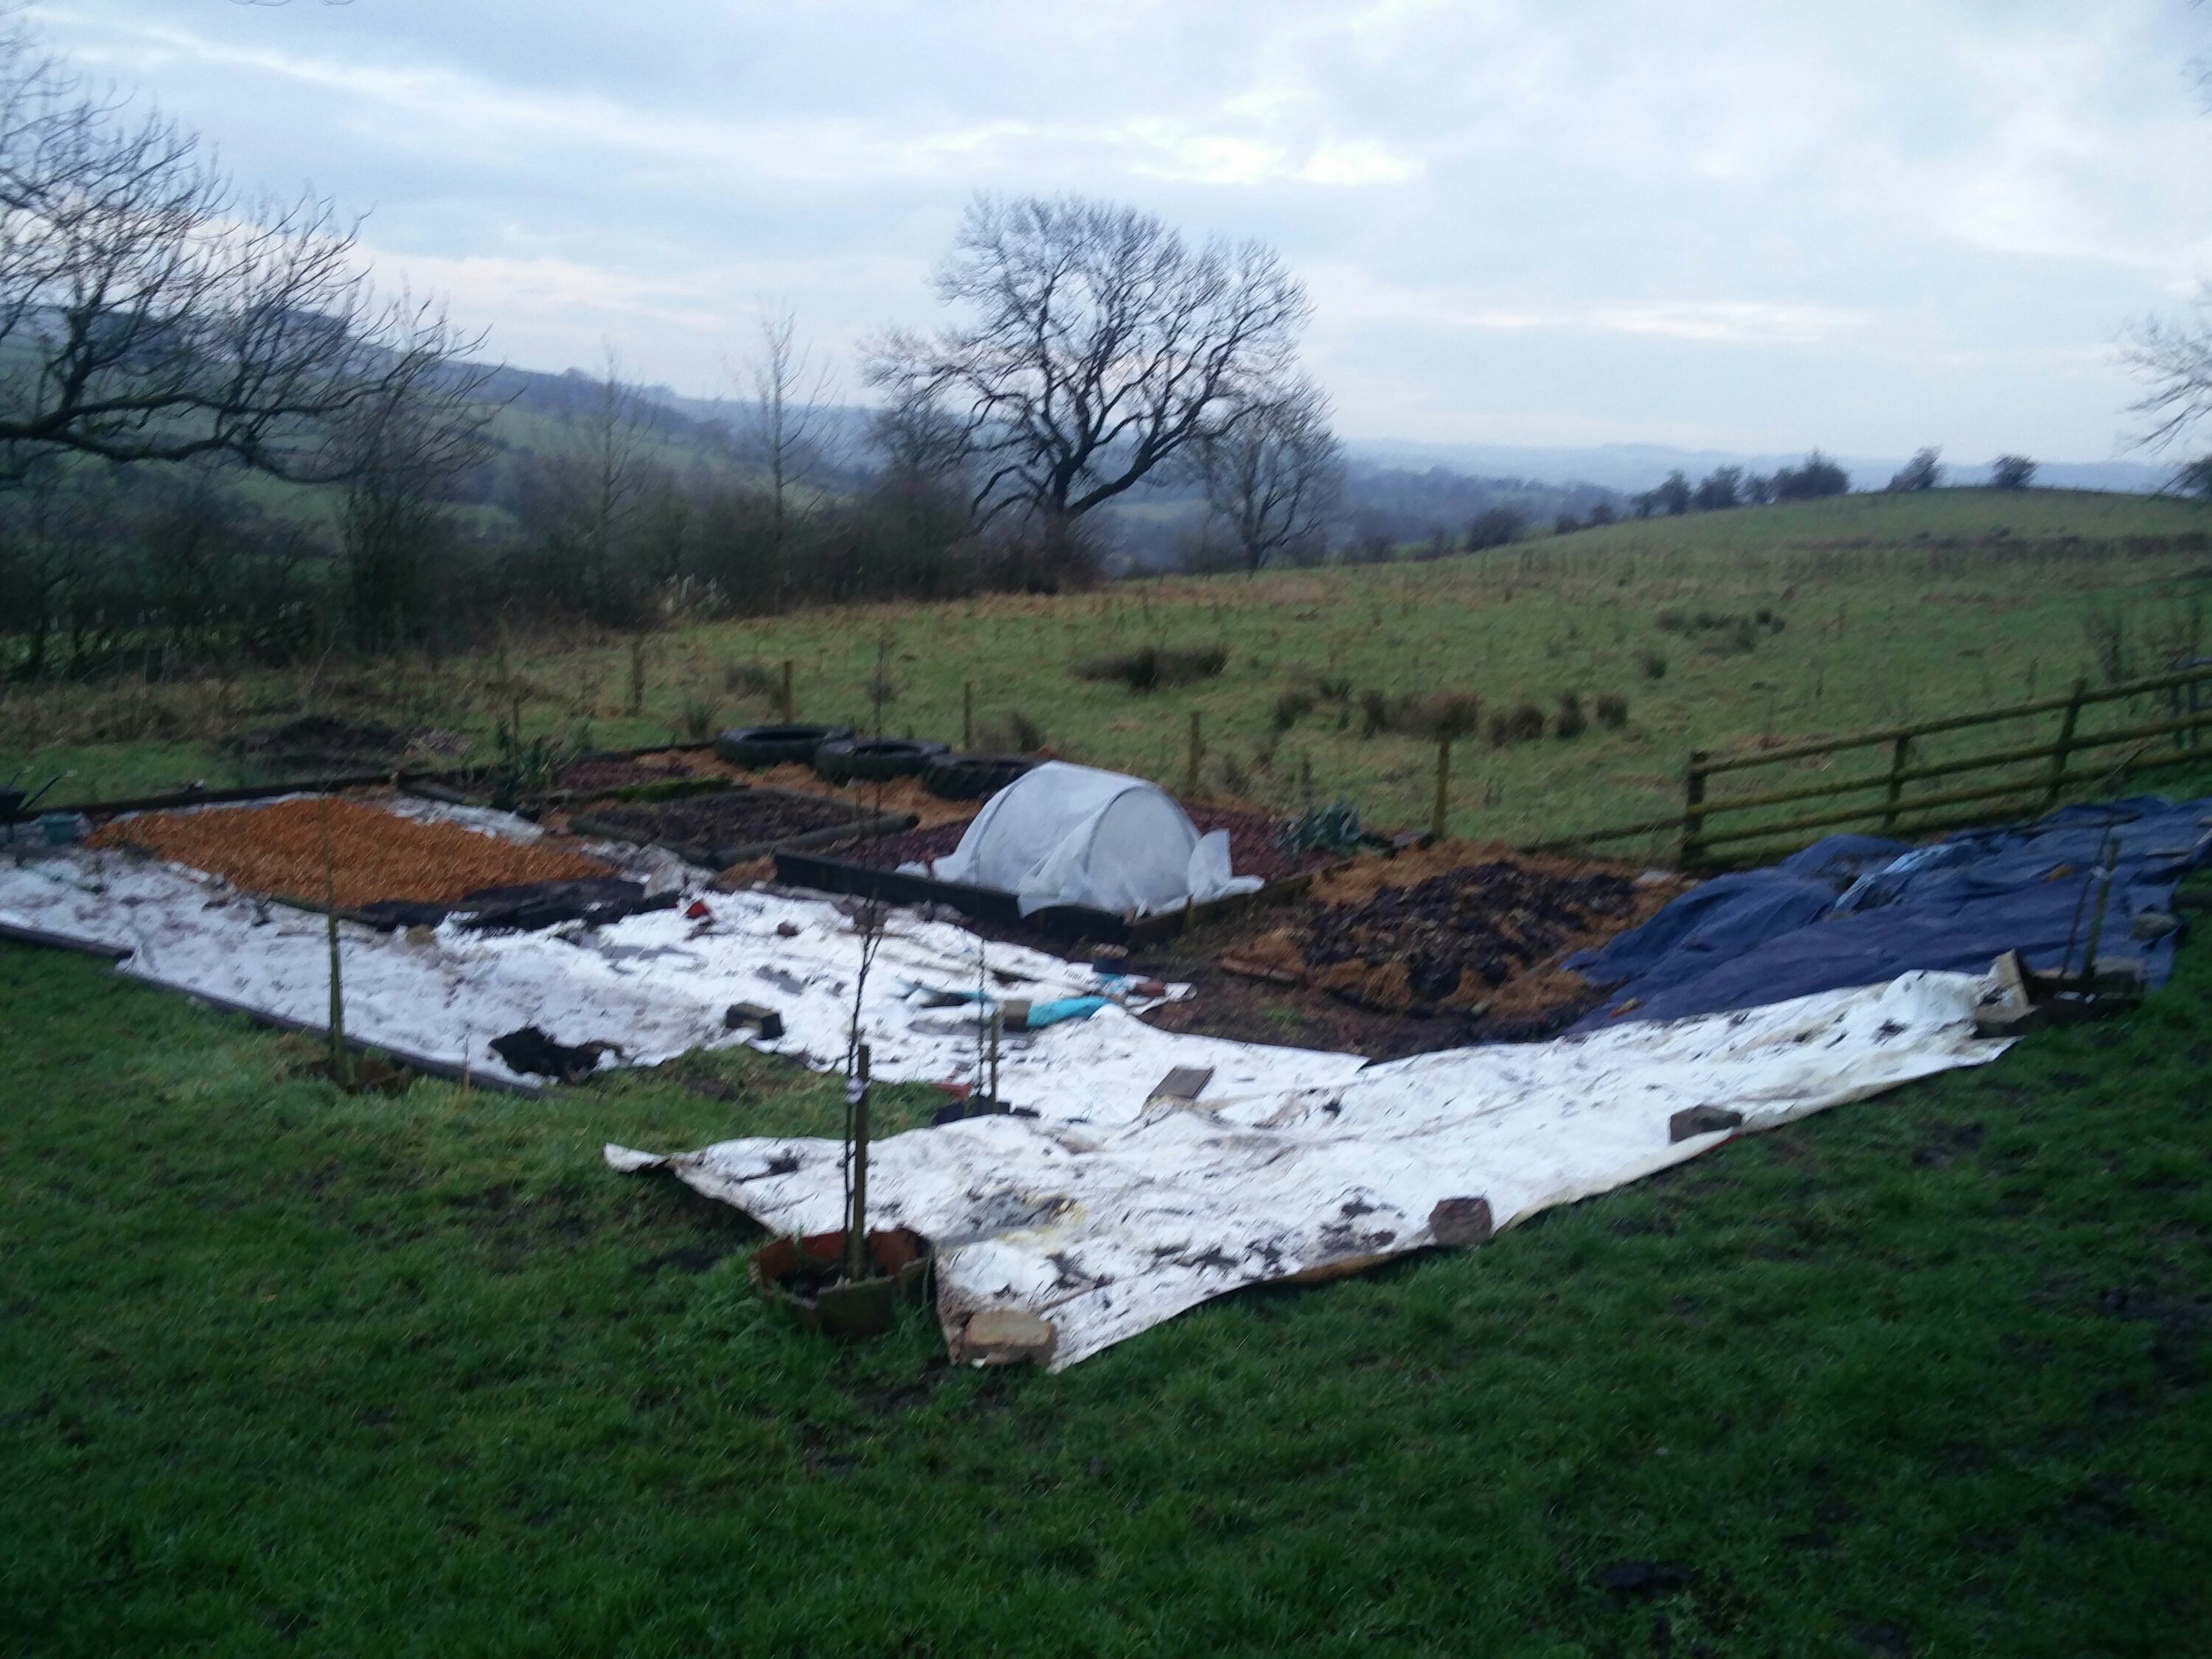
The rest of the afternoon was spent barrowing the haul on next year’s edible shrub and hop bed which has the following layers:

1) 3 Trenches dug through turning over topsoil (we had a man and digger hired in for another job so he managed this pretty quickly)

2) Twigs, sticks and any other woody material I could find at the time placed at the bottom of the trench.

3) Topsoil shovelled back on top but upside down.

4) 6 month old (fresh) manure (about 8 inches)

5) Man made banner (plastic sheeting)

The bed has been like this for about 6 months.

I dug the trenches initially so I could add the wood material (hugelkultur style). However, it will be no-dig from now on as are all of my other beds. This is how the bed looked half covered (it was dark when I finished)

All of this area will eventually be  mulched with organic material for both growing fruit, veg, herbs and hops and pathways. I’m killing the grass off over the winter using man made materials and layering the beds up with whatever organic material I can get my hands on. Most recently are unwanted leaves (why do people discard their leaves? Oh well, I’ll have them!) And seaweed.

Seaweed is controversial to me now as I found a needle in the last lot and I feel bad for taking it from mother Earth. What I do make sure I do whenever I go to the beach is to pick up as much plastic as possible so I at least feel that I am giving back.

You can kind of see from the last picture the bed on the right is topped with a layer of mouldy hay with seaweed on top. The bottom layer is 18 month old manure. This bed will be ready in 2 years’ time for annuals, maybe sooner for bushes or shrubs.

This year (well, 2017) I haven’t dug over any of my beds in an effort to establish if no-dig is possible. Mulch and mulch and mulch with anything you can get your hands on is the current method I am adopting; whilst carefully making sure that there are layers of different mulches when trying to create ‘soil’ in new beds. From my recent reading, soil should never be bare. It needs it’s protection blanket (mulch) to protect from weathering and weeds and to keep nutrients and water in too.

What do you guys think? Have you tried no-dig? What are your favourite mulches?

Winter sowing! 

I’ve decided that it’s time to start sowing seeds. January has almost passed and although there is still a bit of morning snow on the ground, my trusty books and seed packets advise me that you can show seeds under cover in these winter months. 

I decided to plant some cauliflower in small pots, cabbage in modules, broad beans in a large piece of guttering and peas in the small piece of guttering. The guttering (with drainage holes) allows easy transplanting with minimum root damage and will be kept in the greenhouse. The cauliflower and cabbage are resting nicely on a south facing window sill as I doubt they will germinate otherwise!

Where possible, I get my seeds from Chase Organics, The Organic Gardening Catalogue. You pay a few pennies more per packet, but it is worth it for me to support non GMO and non chemical growing practices. I had great success from last years’ seeds, so fingers crossed this year!! 

Guess the pests? Root veg damage alert!

Look at the damage! Can anyone help me guess the pest?

image

Trail of destruction

image

Looks like nibbles to me….

image

But then nibbling the ends of the baby beets too? This damage looks like slugs????

image

Nice of them to leave me some!

image

Protection so far….

Is the pest of the soft and fluffy variety? Or could it be our chicken? Slugs? Any suggestions greatly appreciated!

Pallet picket fence

We have loads of pallets lying around so decided to make a picket fence out of them to stop the chicken going on the veggies.

The difficulty in working with pallets is that they break easily so it is worth watching a few YouTube vids to find the right method for the right type of pallet. This vid (although long and annoying) was the one I found most helpful.

image

Firstly we measured the picket fence spikes and used a jig saw to cut them out. You will also need to jig saw all the back bits as per the above vid.

image

Next was brute force. You will also find that you can’t help singing Peter Gabriel’s “Sledgehammer”. I still have it in my head….

image

Dealing with the nails…..

image image

Knocking posts in and screwing the pallets in.

image image image

Finished product! I am awfully chuffed with our basically free fence!!! It just needs a bit of paint now!

Growing Cucumbers

This weekend is the time to unleash my cucmbers out of their small pots. Cucmbers need a lot of two things; food and water. It can get quite expensive to have huge pots of compost for each plant so I decided to put some manure in the bottom of medium sized pots to give the needy roots continuous nutrients.

image

As you can see I have broken the semi rotted black gold up and filled the pots up half way.

I used last year’s climbing terrace made out of two old bits of wood and chicken wire.

image image

So all I have to do now is regularly water and train the plants through picking out side shoots and giving them a bit of direction :). Let’s hope the manure works!

Protecting From the Elements

Yesterday down the plot was all about protection. Although the sun has been out,  the wind is still strong and showers heavy. To give juvenile plants a start to get strong, I made a few shelters!

image

Squash Protection
Two years ago I lost my first sowing of squash and pumpkin seedlings to torrential rain and wind. The second sowing of the year survived because of a triangular A-frame I made out of scrap wood. I decided to use the A-frame again this year to shelter the squash somewhat from the elements.

image

Tomato Protection
I have an abundance of cucumber, pepper, aubergine, chilli and tomato plants so decided to use the rest of the potato bed and plant tomatoes to make space in the greenhouse. I feel very proud of the makeshift protective greenhouse.

image image image image

Brassica Protection
My cabbages have been destroyed by slugs. I am devastated due to the amount of time and effort I have put into making sure they are protected from club root. A fellow allotmenteer gave me some sprouts a week ago (a purple variety!?) so I planted them out next to the eaten cabbages. I’ve now put netting over the whole patch to protect from wind and butterflies.

image